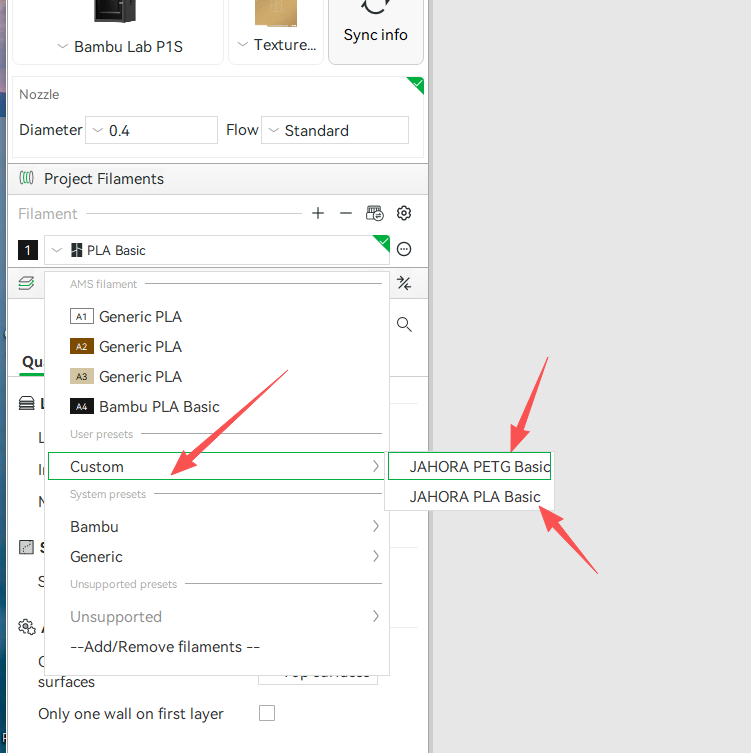
Download & Use Guide
Step 1 – Download the Profile
Download the printing profile using the link below.
This preset is specifically optimized for Bambu Lab 3D printers, ensuring stable extrusion, reliable adhesion, and consistent print quality.
Step 2 – Extract the File
After downloading, locate the ZIP file on your computer.
Right-click the file and extract it to a folder.
Make sure all files are fully extracted before proceeding.
Step 3 – Import into Slicer (Desktop)
Open your slicing software (e.g., Bambu Studio) on your computer.
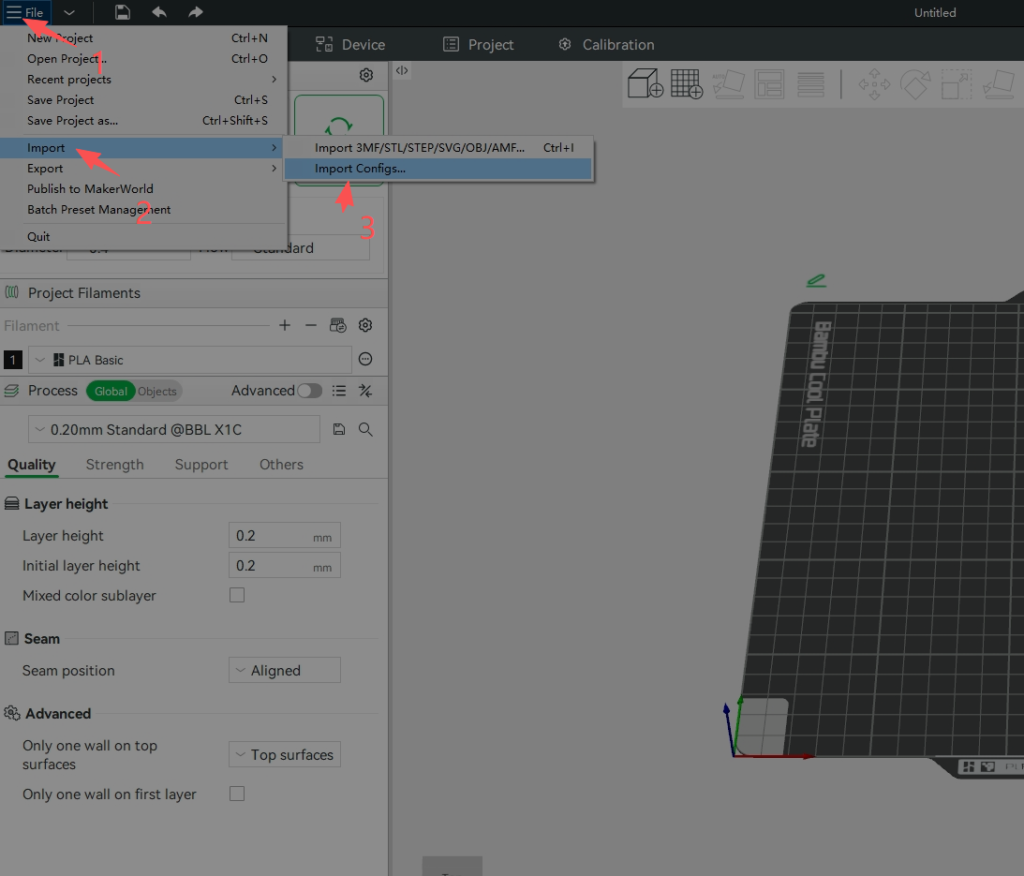
Go to the top-left menu and click File → Import → Import Configs.
Select the extracted folder, choose all files, and import them into the software.
Once imported, make sure the profile is selected before starting your print.
Step 4 – Verify & Start Printing
After importing, go to the custom profile section in your slicer and check whether the “Jahora” profile is available.
If you can see the Jahora-related preset, it means the import was successful.
Select the corresponding Jahora profile before printing to ensure optimal performance. Using the default profiles is not recommended, as they are not specifically tuned for this filament.